No its not a visit to the dentist. It's ROCK Racing on a training ride. My brakes have been screeching and squealing for too long now. I've got to do something about it before I stop getting invited to group rides. So here goes, a brake change with some new Brake Authority pads. They have a few different models that change pad material depending on the kind of riding you do. I picked the Burly which is recommended for XC and Enduro.
The UPS guy delivered the box of pads only like two days after I ordered them. Amazing. Brake Authority must have boxed them up the very second my order went in.

My Superfly 100 brakes are Avid Elixir R hydraulic front and rear. They are a big step up from the old cable operated brakes I had on my Gary Fisher Cake. I used to think they were as good as you could get. But that was before I tried Shimano hydraulic brakes. The SLX and XTR models are awesome. Maybe these new pads will help the Elixirs perform more like Shimanos.

So to start on this brake job, remove the retainer clip from the wheel side of the caliper. (and yes, I am doing bike maintenance in the kitchen, but it's Ok my wife is gone for the weekend and she will never know :)

I used a needle nose pliers to pull it off. Just be careful, this clip is small and easy to break if you yank it with a big ol vise grip or pry it sideways with a screwdriver.

Next remove the threaded pad hanger pin with a 2.5mm hex key. I like to use these plastic body multi-key tools, easy to keep all the sizes together in one place.

The hanger pin is threaded under the head. Different than most bolts you see, its done this way so the pads are free to move around on the pin without getting in a bind.

I put the two pieces together while I worked, less chance of them getting bumped off somewhere and lost.

Now you can pull the old pads out of the caliper. Fingers work great for this.

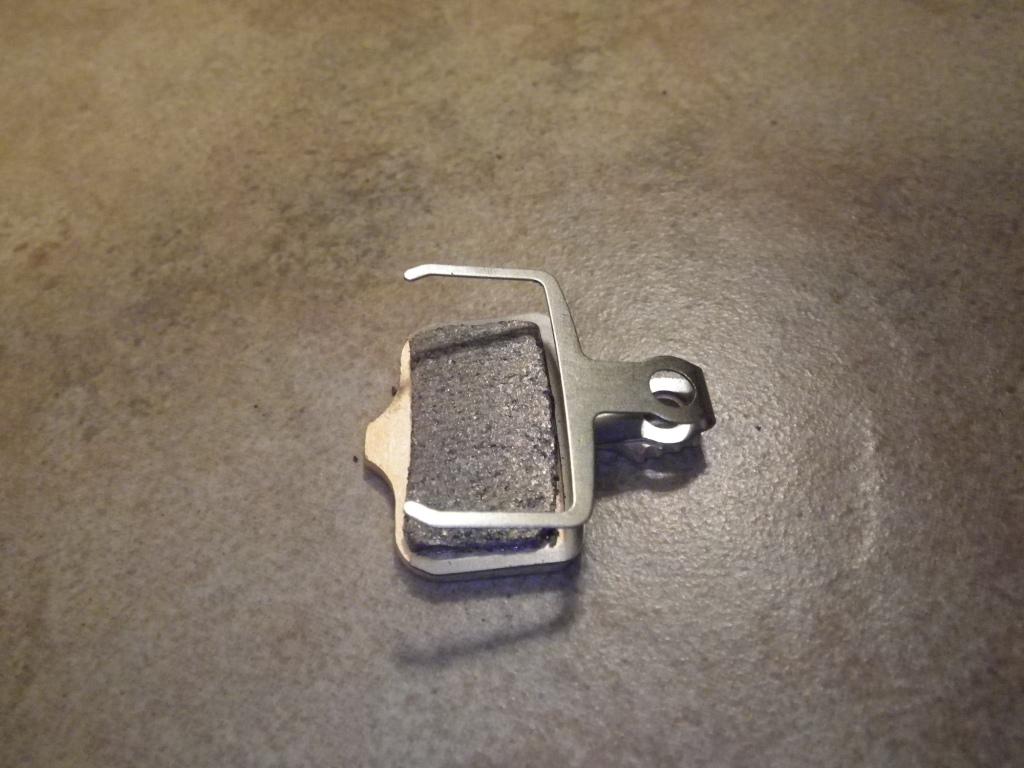
So here is why I think my old pads were so noisy. There was plenty of pad material left but its been glazed, pitted, and cracked. I probably got them contaminated somewhere along the way causing them to go bad. Or maybe Trek uses low quality pads in their factory to save money.

Loosen the caliper mounting bolts, but don't remove them. When you re-assemble, the caliper has to be loose enough to allow the new pads to center over both sides of the rotor with enough free play to slip in the gap between the caliper piston and the rotor.

The new pads came with a replacement spring. It is cutout to fit right in between the new pads. Keep these brake surfaces clean! Don't want them ending up like my last set, I even avoided touching them with my fingers.
Make a little sandwich of the two pads with the spring in the middle. Put the new pad/spring stack in the caliper carefully sliding it over the rotor.

Put the pad hanger pin back in, and torque it with the 2.5mm hex key.

Re-install the retainer clip.

Use the 5mm hex key to torque down the caliper bolts. You want to tighten these while holding hand pressure on the brake handle, this will force everything into alignment as you torque them down. Give the wheel a spin and listen/feel for any rubbing. If you hear any rubbing, loosen the bolts, then do the torque while squeezing the brake handle again.

Done! Now its time to go for a ride. Watch for another post soon to review how the Brake Authority-Burly pads work out.

Hmmm...that's pretty much how my brakes sound. Uh oh...if I stop getting invited along I'll know why! Nice photo how-to. I almost feel like I could do it on my own.
ReplyDeleteThanks for sharing with us....
ReplyDeleteSeveral factors must be taken into consideration when buying Avid Elixir for any bike. This is because the efficiency with which they can be used highly depends on how you choose them.